This Grandma’s Classic Flaky Pie Crust is a timeless, foolproof recipe that delivers tender, buttery layers with every bite. Made with simple pantry ingredients like pastry flour, cold butter, and shortening, this crust bakes up light, crisp, and beautifully flaky. Whether you’re preparing a sweet dessert pie or a savory dinner pie, this homemade crust provides the perfect foundation for any filling.
Who Is This Recipe For?
This pie crust recipe is perfect for:
- Home bakers who want a reliable, old-fashioned crust
- Beginners looking for a simple, forgiving dough
- Pie lovers who appreciate flaky, buttery texture
- Holiday bakers preparing pies for Thanksgiving, Christmas, or family gatherings
- Anyone avoiding store-bought crusts in favor of homemade quality
Why It’s Great
- 🧈 Ultra Flaky Texture: Cold butter and shortening create perfect layers
- 🥧 Versatile: Works for sweet and savory pies alike
- ❄️ Make-Ahead Friendly: Can be refrigerated or frozen
- 🍴 Simple Ingredients: No preservatives or additives
- 👵 Classic Technique: A traditional method that never fails
Ingredients
- 3 cups pastry flour
- ½ cup shortening
- ½ cup cold butter, cubed
- ½ cup ice-cold water
- 1 tablespoon white vinegar
- 1 teaspoon salt
Kitchen Equipment Needed
- Large mixing bowl
- Pastry cutter or fork
- Measuring cups and spoons
- Rolling pin
- Clean work surface
- Plastic wrap
Instructions
Step 1: Mix the Dry Ingredients
Sift the pastry flour into a large bowl and stir in the salt. This ensures even distribution and a lighter crust.
Step 2: Cut in the Fats
Add the cold butter and shortening to the flour mixture. Using a pastry cutter or fingertips, blend until the mixture resembles coarse crumbs with visible pea-sized pieces of fat.
Step 3: Add the Liquid
In a small bowl, combine the ice-cold water and vinegar. Slowly drizzle the liquid into the flour mixture, stirring gently with a fork just until the dough begins to come together. Do not overmix.
Step 4: Divide and Roll
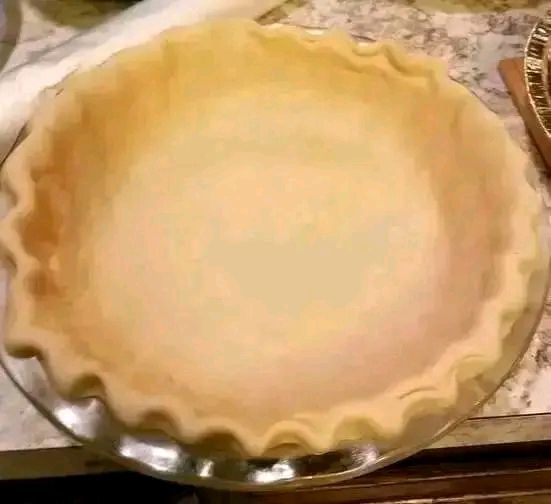
Divide the dough into two equal portions. On a lightly floured surface, roll one portion into a circle about ⅛-inch thick and slightly larger than your pie dish. Carefully transfer it into the dish, allowing excess to hang over the edges.
Step 5: Assemble the Pie
For a single-crust pie, trim and crimp the edges. For a double-crust pie, roll out the second portion, place it over the filling, seal, trim, and crimp the edges as desired.
Step 6: Bake
Bake according to your pie recipe’s instructions. Most pies bake at 375–400°F (190–205°C) for 30–45 minutes, depending on the filling.
Storage
- Refrigerator: Wrap the dough tightly in plastic wrap and refrigerate for up to 2 days.
- Freezer: Freeze wrapped dough for up to 4 weeks. Thaw overnight in the refrigerator before rolling.
- Baked Crust: A baked pie crust can be stored at room temperature for 1 day or refrigerated for up to 3 days.
FAQ
Why is vinegar added to pie crust?
Vinegar prevents gluten formation, resulting in a more tender crust without affecting flavor.
Can I use all butter instead of shortening?
Yes, but using both butter and shortening creates the best balance of flavor and flakiness.
How do I prevent a tough crust?
Avoid overmixing and always keep your ingredients cold.
Can this dough be made in advance?
Absolutely. This crust is perfect for prepping ahead and storing in the fridge or freezer.
Conclusion
This Grandma’s Classic Pie Crust Recipe is the secret to bakery-quality pies at home. With its flaky layers, rich buttery taste, and simple technique, it’s a recipe you’ll come back to again and again. Whether filled with apples, pumpkin, or a savory pot pie mixture, this crust transforms any pie into something truly special. Once you try it, store-bought crusts won’t compare.